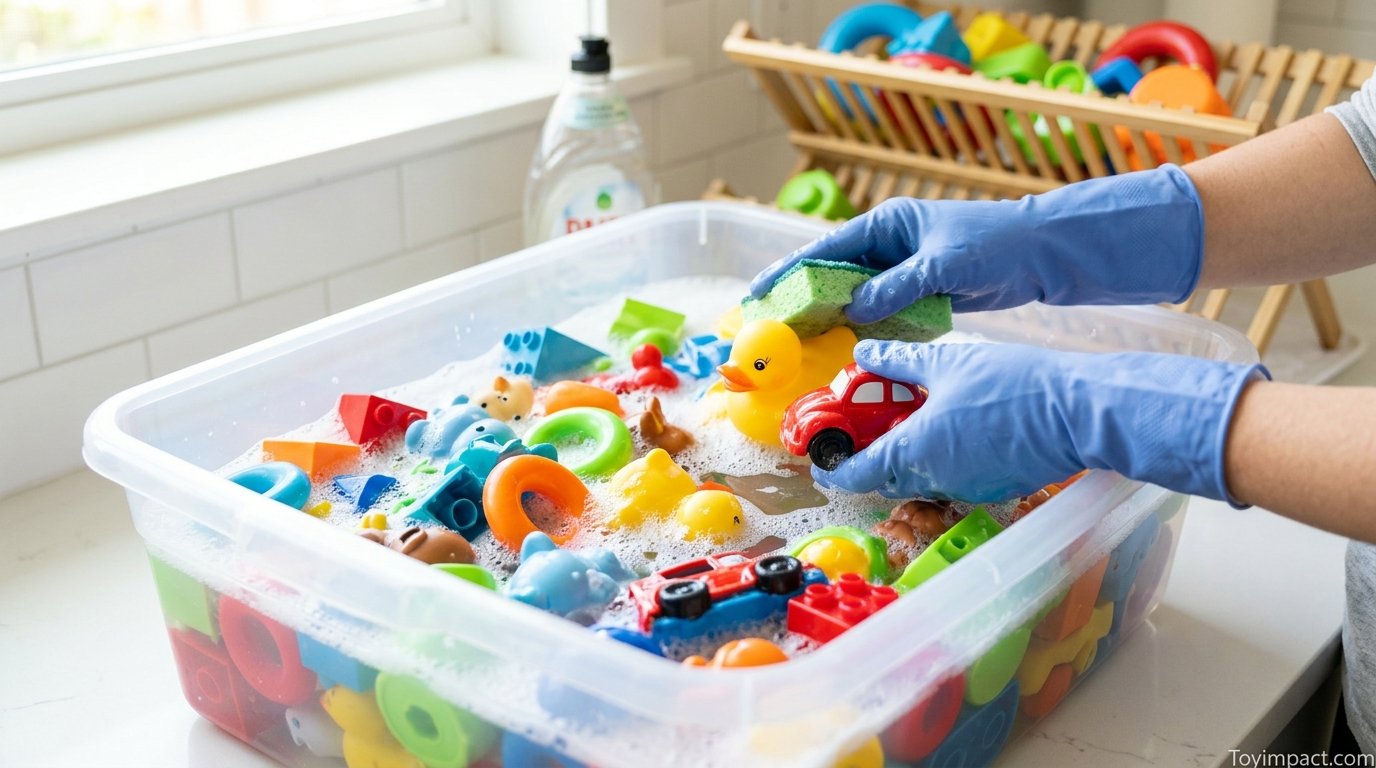
How to Clean Plastic Toys Safely: A Complete, Parent-Tested Guide
Everything you need to know about washing, disinfecting, and drying plastic toys without damaging them or exposing your child to harsh residue.
Why Cleaning Plastic Toys Safely Matters
Plastic toys go everywhere a child goes — into the bath, onto the kitchen floor, into daycare bins, and, inevitably, into little mouths. That constant contact means toys pick up far more than dust. Saliva, food residue, nasal secretions, and whatever was on the floor before the toy landed there all build up on hard plastic surfaces, in seams, and inside battery compartments. For toddlers and preschoolers whose immune systems are still developing, this matters more than most parents realize until a cold or stomach bug sweeps through the house and won’t leave.
Cleaning plastic toys “safely” isn’t just about killing germs — it’s about doing so without leaving behind chemical residue that a child could later absorb through skin contact or by mouthing the toy again. Many households reach for whatever spray is under the sink, but ammonia-based glass cleaners, undiluted bleach, and abrasive scouring powders can degrade plastic, strip protective coatings, and leave residues that are far from ideal for a two-year-old’s chewing habits.
There’s also a structural safety angle. Plastic toys with small parts, electronic components, or delicate paint can be damaged by the wrong cleaning method — submerging a battery-operated toy in water, for instance, can ruin it and, in rare cases, create a shock or leakage risk. A safe cleaning routine protects both your child’s health and your investment in the toys themselves.
It’s also worth remembering that “clean” and “sterile” aren’t the same goal, and you don’t need to aim for the latter on a daily basis. A hospital-grade sterilizing routine every single day is neither realistic nor necessary for a typical household — what actually matters is consistency: a light, regular wash for toys in everyday rotation, paired with a more thorough disinfecting pass when circumstances call for it, such as after an illness or before a toy is handed down to another child. Getting that balance right is really the heart of what this guide is about.
Throughout this guide, we’ll cover the full spectrum: quick daily wipe-downs, deeper weekly disinfecting sessions, and how to handle special cases like bath toys, electronics, and toys shared between siblings or brought home from group daycare settings. If you’re also thinking about how toys are stored between play sessions, our guide on organizing toy storage in small spaces pairs well with a clean-toy routine, since a tidy bin is much easier to keep sanitary than an overflowing box.
Understanding Different Types of Plastic Toys
Not all “plastic” is the same, and the cleaning method that works beautifully on one type of toy can dull, crack, or discolor another. Before you grab a sponge, it helps to know roughly what you’re dealing with.
Hard Rigid Plastics (ABS, Polypropylene)
Building blocks, action figures, and most molded toys are made from ABS or polypropylene. These plastics are durable and generally dishwasher-safe if there are no electronics or paper stickers involved. They tolerate warm soapy water, mild disinfectants, and a fair amount of scrubbing without damage.
Soft Flexible Plastics (PVC, TPR, TPE)
Bath toys, teethers, and squeeze toys are often made from softer, more flexible plastics. These materials are more porous than rigid plastics, which means they can trap moisture and grow mold inside hollow cavities — a detail we’ll return to in the bath toys section. They also react poorly to high heat, so boiling or dishwasher cycles aren’t always appropriate.
Painted or Printed Surfaces
Many toys have printed graphics, stickers, or painted details layered onto the base plastic. Abrasive scrubbing, alcohol-based cleaners, and dishwasher heat can lift paint or fade prints. These toys generally need a gentler hand-wash approach rather than a machine cycle.
Electronic and Battery-Operated Toys
Anything with sound modules, lights, or motors needs a completely different approach — no submerging, no spraying directly onto seams, and careful attention to the battery compartment. We’ll dedicate a full section to this later in the guide.
If you’re building out a toy collection with an eye toward easy cleaning from the start, it’s worth checking which materials show up most often in age-appropriate picks, like the options in our best toys under $20 for toddlers roundup — many budget-friendly toddler toys favor rigid, dishwasher-safe plastics precisely because they’re easier to keep clean.
Safety First: What to Avoid When Cleaning Toys
Before we get into the “how,” it’s worth being explicit about the “how not to.” A few common household habits can turn a routine cleaning session into a hazard.
Avoid These
- Undiluted bleach directly on toy surfaces
- Ammonia-based glass or multi-surface cleaners
- Mixing bleach with vinegar or ammonia products (produces toxic fumes)
- Submerging battery compartments or electronic toys
- Boiling soft PVC or TPE toys
- Abrasive scouring pads on painted surfaces
- Alcohol-based sanitizing wipes on printed decals
Safer Choices
- Diluted dish soap and warm water
- Properly diluted bleach solution (rinsed thoroughly, toy fully dried before play)
- White vinegar solutions for mineral buildup
- Soft microfiber cloths and gentle brushes
- Air-drying in sunlight or a well-ventilated space
- Manufacturer-recommended cleaning notes when available
One detail that catches parents off guard: never mix cleaning chemicals in the same bucket, even if each one seems mild on its own. Combining bleach with vinegar, ammonia, or certain “natural” cleaners can release chlorine gas or chloramine vapors, which are genuinely dangerous in an enclosed space like a bathroom or playroom. Stick to one cleaning agent per session, rinse thoroughly, and ventilate the room.
If a toy is intended for a child with sensory sensitivities or who mouths objects more than typical for their age, it’s also worth reviewing our sensory toy gift guide, which touches on material choices that tend to be gentler for frequent hand-to-mouth contact.
Essential Supplies You’ll Need
You don’t need a specialty toy-cleaning kit — most of what you need is already in your kitchen or bathroom cabinet. Here’s a practical checklist.
| Supply | Purpose | Notes |
|---|---|---|
| Mild dish soap | Everyday hand-washing | Fragrance-free is gentler on repeat use |
| White vinegar | Mineral deposits, mild disinfecting | Dilute 1:1 with water |
| Baking soda | Scuff marks, gentle abrasive | Make a paste with water |
| Soft-bristle brush or old toothbrush | Getting into seams and textured surfaces | Dedicate one brush to toy cleaning only |
| Microfiber cloths | Wiping and drying | Avoid paper towels on painted surfaces |
| Diluted bleach solution | Disinfecting after illness | 1 tablespoon bleach per gallon of water, per common household guidance |
| Drying rack or clean towel | Air-drying | Choose a spot with good airflow |
| Cotton swabs | Battery compartments and small crevices | Use dry or barely damp |

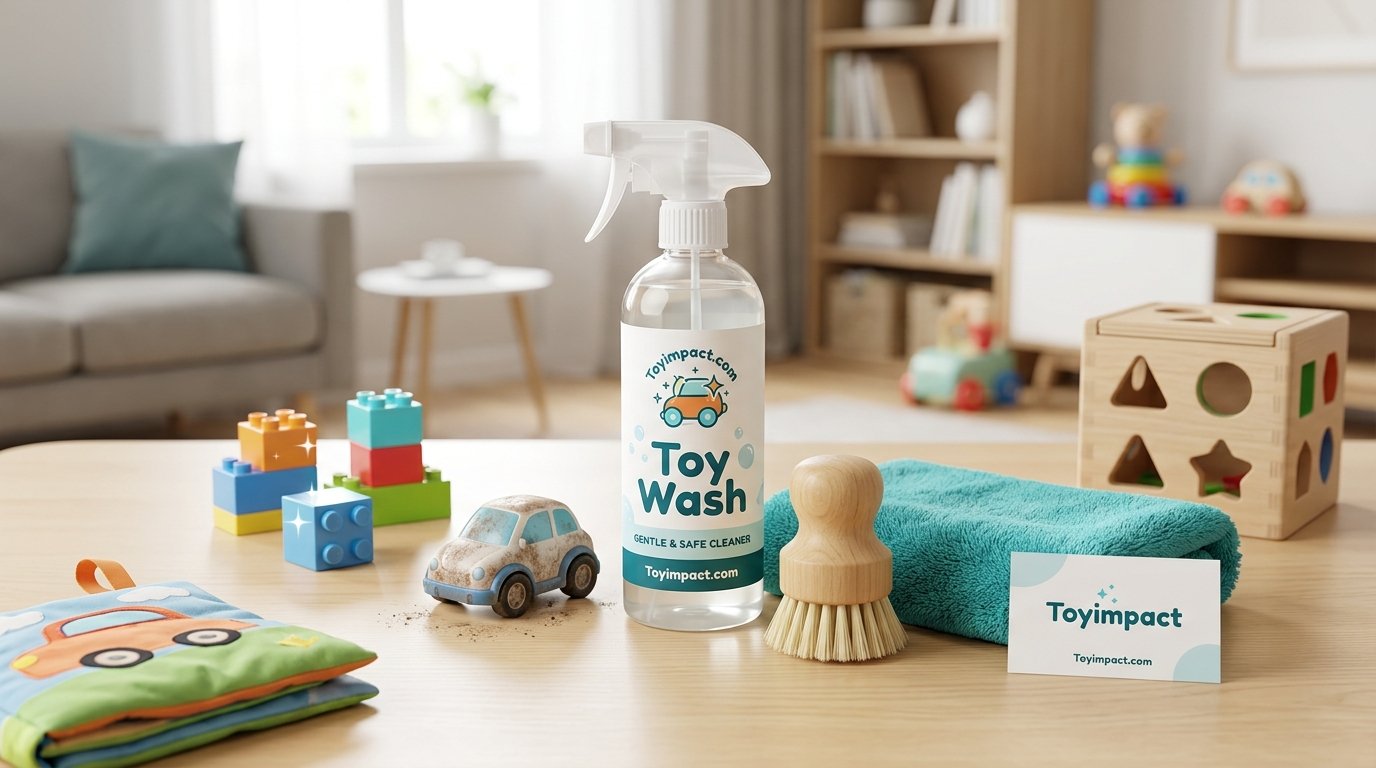
Skip the guesswork: a dedicated, non-toxic toy cleaning spray takes the mixing and measuring out of the equation and is safe for daily use on hard plastics.
Check Price on AmazonMethod 1: The Basic Hand-Wash (Everyday Cleaning)
This is the method you’ll use most often — a quick, low-effort routine suited to toys that don’t need full disinfecting, just a refresh from everyday dust and grime. It works on nearly every rigid plastic toy and most painted surfaces when done gently.
Step 1: Sort and Pre-Rinse
Separate toys by material before you start. Pull out anything electronic or battery-operated and set it aside for the dedicated method later in this guide. For everything else, give each toy a quick rinse under warm running water to knock off loose dust, sand, or crumbs before soap ever touches the surface. This prevents you from just smearing debris around with a soapy cloth.
Step 2: Wash with Diluted Dish Soap
Mix a small squirt of fragrance-free dish soap into a bowl of warm water — you want a light, sudsy solution rather than a strong concentrate. Dip your microfiber cloth or soft brush into the solution and wipe down every surface of the toy, paying special attention to seams, joints, and textured areas where grime likes to hide. For toys with small crevices, an old toothbrush reaches spots a cloth can’t.
Step 3: Rinse and Air-Dry Completely
Rinse every trace of soap off with clean water — leftover soap film can attract more dust and, on toys that get mouthed, isn’t something you want lingering. Lay the toy on a clean towel or drying rack in a well-ventilated area, ideally somewhere with indirect sunlight, and let it air-dry fully before returning it to the toy bin. Skipping this step and stacking damp toys back into a closed bin is one of the fastest ways to invite mildew.
Families with more than one child at home often find this quick routine especially useful when toys move between kids of different ages — see our guide on toys siblings can play with together for picks that tend to hold up well to frequent handling and cleaning.
Method 2: Deep Cleaning & Disinfecting
This method goes further than a basic wash and is meant for situations that call for real disinfection — after a cold or stomach bug has gone through the house, before a new sibling arrives, when toys are heading to a consignment sale, or on a monthly deep-clean schedule for frequently mouthed items.
Step 4: Prepare a Diluted Disinfecting Solution
A commonly used household disinfecting ratio is about one tablespoon of regular unscented bleach per gallon of water. Mix this in a well-ventilated area, ideally outdoors or with a window open, and never combine it with any other cleaning product. Always add bleach to water, not the reverse, and use it within the same day you mix it since diluted bleach loses potency quickly.
Step 5: Soak or Wipe, Then Let Sit
Depending on the toy’s material, either submerge fully washable hard-plastic pieces in the solution for a few minutes, or wipe the surface thoroughly if the toy isn’t submersible. Disinfectants generally need contact time to work — a quick spritz that’s immediately wiped away doesn’t accomplish much. Let the solution sit on the surface for the time recommended on your product, or a few minutes for a basic diluted bleach mix, before rinsing.
Step 6: Thorough Rinse and Full Dry
Rinse every piece under running water until you can’t detect any bleach smell, then dry completely before storing or returning toys to play. This final rinse-and-dry step is arguably the most important one in the entire disinfecting process, since it removes chemical residue a child could otherwise contact directly with their skin or mouth.

For quick disinfecting between full wash cycles, alcohol-free, baby-safe wipes are a convenient middle ground — gentler than a bleach soak but stronger than plain water.
Check Price on AmazonCleaning Battery-Operated and Electronic Toys Safely
Electronic toys need an entirely different mindset: no soaking, no spraying directly onto the toy, and extra care around the battery compartment and speaker grilles. Start by removing batteries whenever possible — this both protects the electronics and lets you inspect for any corrosion around the terminals, which should be cleaned separately with a dry cloth or a cotton swab lightly dampened with vinegar if buildup is present.
For the toy body itself, dampen a microfiber cloth with your diluted soap solution — damp, not wet, with no dripping — and wipe down the exterior. Avoid seams where liquid could seep toward internal components, and never point a spray bottle directly at buttons, speaker holes, or charging ports. Cotton swabs are useful for cleaning around buttons and in tight crevices without introducing excess moisture.
Let electronic toys air-dry completely, ideally overnight, before reinserting batteries. If a toy has gotten more moisture than intended, leaving it open (battery compartment included) in a dry, ventilated spot for 24–48 hours before testing it again is the safer move rather than immediately powering it back on.
It is also worth periodically checking battery contacts even on toys that seem to be working fine. A faint white or greenish crust around the terminals usually signals early corrosion, often from an old battery that leaked slightly before anyone noticed. Wiping this away promptly with a dry cotton swab, or one very lightly dampened with white vinegar for stubborn buildup, can extend the life of the toy considerably and prevents the corrosion from spreading to the point where the toy stops making reliable contact altogether.
Bath Toys and Mold Prevention
Bath toys deserve their own section because they combine two conditions mold loves: constant moisture and, in the case of squeeze toys, hollow interiors that never fully dry between uses. That black or pink gunk that sometimes squirts out of a bath toy is typically mold and mildew that’s been growing inside for weeks.
Preventing the Problem Before It Starts
Whenever possible, choose bath toys without small squeeze holes, or seal the hole with a small dab of hot glue if the toy is otherwise a favorite. After each bath, squeeze out as much trapped water as you can and let toys dry fully in an open-air basket rather than a closed bin or the bottom of the tub.
Cleaning Toys That Already Have Mold Buildup
Soak affected toys in a solution of equal parts water and white vinegar for about an hour, then squeeze the toy repeatedly underwater to flush out the interior. Rinse thoroughly with clean water, squeeze again to expel it, and let the toy air-dry fully — ideally hole-down so any remaining moisture drains out rather than pooling inside.
| Bath Toy Type | Mold Risk | Best Practice |
|---|---|---|
| Squeeze toys with holes | High | Seal holes or replace regularly; vinegar soak monthly |
| Solid rubber ducks (no holes) | Low | Basic wash and dry; monitor for cracks |
| Stackable cups/rings | Low–Medium | Air-dry fully upside down between uses |
| Floating foam toys | Medium | Avoid full submersion; wipe and air-dry |
For families setting up a backyard water play area, the same drying principles apply — check our water table toy guide for picks with fewer hollow, hard-to-dry cavities.
DIY vs. Store-Bought Toy Cleaners
There’s a genuine trade-off between mixing your own cleaning solutions and buying a dedicated toy-safe product, and the right choice depends on how much time you want to spend measuring versus how much you’re willing to spend on convenience.
| Factor | DIY Solutions (Vinegar/Soap) | Store-Bought Toy Cleaners |
|---|---|---|
| Cost | Very low, pantry staples | Moderate, ongoing purchase |
| Convenience | Requires mixing and measuring | Ready to use, consistent dilution |
| Disinfecting power | Mild (vinegar) to strong (diluted bleach) | Varies; check label for EPA-registered claims |
| Residue concerns | Low if rinsed properly | Formulated to be low-residue, but read labels |
| Best for | Everyday washing, budget-conscious households | On-the-go cleaning, sensitive skin, convenience |
In practice, many households land on a hybrid routine: a homemade soap-and-water wash for daily use, a store-bought disinfecting spray for quick between-clean touch-ups, and an occasional diluted bleach soak for full disinfecting after illness.

Plant-based, fragrance-free cleaners strike a nice middle ground — no bleach smell, no heavy mixing, and gentle enough for daily rotation.
Check Price on AmazonDrying and Storage Best Practices
Cleaning is only half the job — how you dry and store toys afterward determines whether that effort actually pays off. A perfectly washed toy that gets tossed damp into a closed plastic bin can grow mildew within days, undoing the entire process.
Use an open drying rack, a clean towel in a ventilated spot, or an outdoor line on a sunny day whenever weather allows — indirect sunlight has a mild natural disinfecting effect and speeds up drying considerably. Avoid stacking toys while they’re still damp, and give hollow toys extra time, checking that no water remains trapped inside before storage.
Once dry, store toys in bins with some airflow rather than fully airtight containers, especially in humid climates. If you’re rethinking your storage setup entirely, our piece on organizing toy storage in small spaces covers bin types that balance tidiness with breathability.
How Often Should You Clean Toys?
There’s no single universal answer, but a reasonable rhythm looks like this: a quick wipe-down for frequently mouthed toys every few days, a full wash for the general toy rotation weekly, and a deeper disinfecting session monthly or immediately after anyone in the house has been sick. Toys that travel to daycare and back should get a wash on the same day they return home, since they’ve likely been in contact with several other children.
This cleaning rhythm actually pairs naturally with a toy rotation system — pulling toys out of circulation periodically not only keeps play fresh for your child but gives you a built-in opportunity to clean each toy thoroughly before it goes back into the mix. Our guide on how often to rotate kids’ toys walks through setting up exactly this kind of system.
Age-Specific Cleaning Considerations
How often — and how thoroughly — you clean a toy should shift as your child grows. The cleaning demands of a household with a mouthing infant look very different from those of a home with school-age kids who mostly just get their hands dirty outside.
Infants (0–12 Months)
At this stage, almost every toy ends up in a baby’s mouth at some point, so the safest approach leans toward frequent, gentle washing rather than harsh disinfecting. A daily soap-and-water wipe-down for the toys in active rotation, combined with a weekly deeper wash, keeps pace with how often these toys are handled. Because infants can’t yet tell you if a toy tastes or smells “off,” it’s worth being extra diligent about full rinsing — any soap or cleaner residue left behind is something your baby may ingest directly.
Toddlers (1–3 Years)
Toddlers still mouth objects fairly often but are also starting to play more independently, which means toys pick up more environmental grime — dirt from outdoor play, food residue from snack time, and whatever they picked up off the floor. A weekly wash for the main rotation, plus spot-cleaning as needed, is usually sufficient. This is also the age range where toy rotation systems tend to be most useful, since it naturally builds cleaning checkpoints into your routine. If you’re curious about introducing more open-ended, sensory-rich toys at this stage, our guide on the best age to introduce Montessori-style toys covers material considerations worth knowing before you buy.
Preschoolers and Older (3+ Years)
By preschool age, direct mouthing becomes far less common, and toys spend more time in hands than in mouths. Cleaning frequency can typically drop to a biweekly or monthly deep pass, with quick wipe-downs after outdoor play or anyone in the household being sick. This is also a good age to start involving kids in the process — even a simple “let’s wash your toys” activity teaches basic hygiene habits early. Educational and STEM-oriented toys at this age often include more complex parts, so it’s worth checking material-specific care notes; our guide on introducing STEM toys to preschoolers touches on some of the sturdier, easier-to-clean options available for this age group.
Regardless of age, gift-focused toys — the kind given for birthdays or holidays — often arrive with more elaborate packaging, stickers, and mixed materials that need a first, careful cleaning before regular play begins. If you’re shopping for an upcoming celebration, our gift toy guide for 5-year-olds and educational toy guide for 3-year-old boys both feature picks that tend to be straightforward to clean once unboxed.
Common Mistakes to Avoid
- Skipping the rinse step. Leftover soap or disinfectant residue on a mouthed toy defeats the purpose of cleaning it in the first place.
- Mixing cleaning chemicals. Combining bleach with vinegar or ammonia-based products can produce dangerous fumes — always use one product at a time.
- Storing toys damp. This is the single biggest cause of mold and mildew inside hollow bath toys.
- Using dishwasher heat on soft plastics. High heat can warp or degrade PVC and TPE materials even when the toy is technically dishwasher-labeled.
- Ignoring battery compartments. Corrosion and grime collect here just as much as on the toy’s outer surface.
- Over-scrubbing painted details. Abrasive pads can lift paint faster than dirt actually comes off.
If you’re also managing toys for a child who’s aging out of certain categories, it might be a good moment to review our piece on what age kids typically stop playing with certain toys — decluttering and cleaning often go hand in hand.
Signs a Toy Should Be Retired Rather Than Cleaned
Not every toy is worth cleaning indefinitely. Plastic degrades over time, and repeated washing — especially with disinfecting solutions — can accelerate wear that eventually makes a toy unsafe or simply not worth the effort to keep sanitary.
- Cracks or splits in hard plastic. These create new hiding spots for bacteria and moisture that no amount of washing will fully reach.
- Cloudy or brittle texture. UV exposure and repeated washing can break down certain plastics over the years, making them more prone to snapping into sharp-edged pieces.
- Persistent odor after a full deep clean. If a toy still smells musty or sour after thorough washing and drying, moisture has likely gotten trapped somewhere permanent, such as inside a sealed cavity.
- Peeling paint or stickers with adhesive residue that won’t fully clean off. Flaking paint can be a choking hazard for younger children, and sticky residue traps dirt no matter how often it’s wiped.
- Electronic toys that no longer function reliably after moisture exposure. Rather than repeatedly attempting to dry out and revive a toy with intermittent electrical issues, it’s generally safer to retire it.
When it’s time to let a toy go, recycling programs for rigid plastics are worth checking locally, since many municipal recycling streams accept clean, hard plastic toys even if they don’t accept flexible or mixed-material ones. This is also a natural moment to reassess what’s actually being used day to day — pairing a cleaning session with a light declutter tends to make the next round of washing faster for everything that stays.
Frequently Asked Questions
Is it safe to put plastic toys in the dishwasher?
Hard, rigid plastic toys without electronics, stickers, or painted details are often dishwasher-safe on a top rack, low-heat cycle. Soft PVC or TPE toys, anything with batteries, and painted or printed pieces should be hand-washed instead, since dishwasher heat can warp or fade them.
What’s the safest disinfectant to use around babies and toddlers?
A diluted bleach solution (about one tablespoon per gallon of water), rinsed thoroughly and fully dried before play, is a commonly recommended option. Alcohol-free, baby-safe disinfecting wipes are a gentler alternative for quick between-clean touch-ups.
Can I use baby wipes to clean toys?
Baby wipes can handle light surface dust and quick touch-ups, but they aren’t formulated as disinfectants and won’t remove built-up grime the way a proper soap-and-water wash does. Use them for quick refreshes, not as a substitute for a full cleaning session.
How do I get mold out of squeaky bath toys?
Soak the toy in a 50/50 vinegar-and-water solution for about an hour, then repeatedly squeeze it underwater to flush the interior, rinse thoroughly, squeeze again to expel water, and air-dry hole-side down. If mold keeps returning, it may be time to retire that particular toy.
Is vinegar strong enough to disinfect toys?
Vinegar has mild antimicrobial properties and works well for general cleaning, mineral deposits, and light mold prevention, but it isn’t considered a hospital-grade disinfectant. For situations that call for stronger disinfection, such as after an illness, a diluted bleach solution or an EPA-registered disinfectant product is more appropriate.
Can I clean electronic or battery-operated toys with water?
Never submerge electronic toys. Use a barely damp microfiber cloth on the exterior, avoid seams and speaker grilles, remove batteries first when possible, and let the toy air-dry fully before use.
How often should toys be cleaned?
A general rhythm is a quick wipe every few days for frequently mouthed toys, a full wash weekly for the toy rotation in regular use, and a deeper disinfecting session monthly or right after an illness passes through the household.
Do I need special toy-cleaning products, or is dish soap enough?
Plain, fragrance-free dish soap diluted in warm water is enough for most everyday cleaning. Dedicated toy cleaners add convenience and consistent dilution but aren’t strictly necessary for routine washing.
Why do some plastic toys smell bad even after washing?
A lingering smell often means moisture is trapped somewhere the cleaning didn’t reach — inside a hollow cavity, a seam, or a battery compartment. It can also indicate the plastic itself has started to degrade. Try a longer air-dry period, and consider retiring toys with a persistent odor.
Is it okay to clean toys outside in the sun?
Yes — sunlight has a mild natural disinfecting effect and speeds up drying significantly, which is genuinely helpful after a wash. Just be aware that prolonged, repeated sun exposure can eventually fade painted colors on some toys over time.
How do I clean toys that go in the car for long trips?
Car toys accumulate crumbs, spilled drinks, and general grime quickly. A weekly wipe-down with a diluted soap solution, plus a quick check for anything sticky wedged into crevices, keeps them in good shape. If you’re stocking up for travel, our car ride toy guide highlights options that are easier to keep clean on the road.
Should toys be cleaned differently before a new baby arrives?
Yes — a full deep-clean and disinfecting pass, rather than just a quick wipe, is a good idea for any hand-me-down toys headed toward an infant, since babies have less developed immune systems and mouth objects constantly.
Can I use a magic eraser or melamine sponge on plastic toys?
Melamine sponges can lift scuffs and marker stains effectively, but they’re mildly abrasive, so it’s best to test on a small, hidden area first and avoid using them on painted or printed surfaces where they can dull the finish over time.
What should I do if a toy has a lingering chemical smell right out of the box?
A brand-new plastic smell often fades with airing out and one gentle soap-and-water wash before first use. If a strong chemical odor persists well beyond that, it’s reasonable to hold off on giving the toy to a young child and check the manufacturer’s guidance or consider returning it.





Pingback: What Are Gender-Neutral Toys? Parent's Guide
Pingback: How to Clean Bath Toys: Mold-Free Bath Time Guide
Pingback: How to Clean Squishy Toys Without Ruining the Squish
Pingback: How to Clean Battery Corrosion in Toys Safely