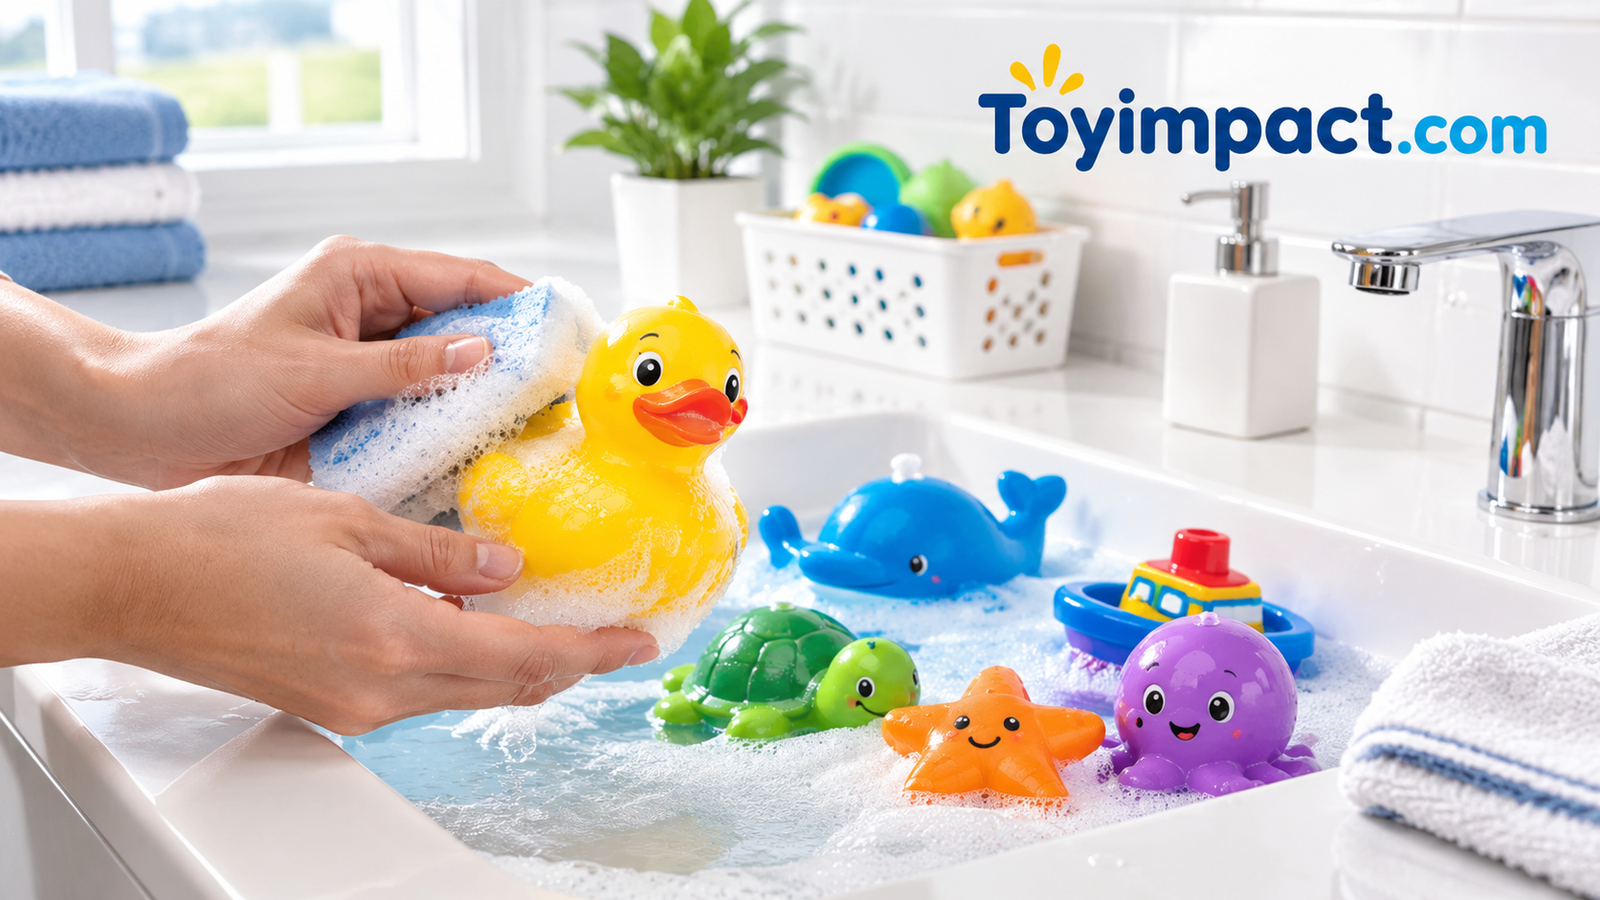
How to Clean Bath Toys: The Complete Guide to Mold-Free, Germ-Free Bath Time
Squeaky ducks, floating boats, and stacking cups all trap water and grime. Here is exactly how to clean every type, step by step, without wrecking the toys or risking your child’s health.
Pick up almost any well-loved bath toy, squeeze it, and watch what happens. If a little cloudy water or a few dark flecks come out of that tiny hole, you have just met the reason this guide exists. Bath toys live in warm, wet, soapy conditions, and that is a near-perfect recipe for mildew, bacteria, and slimy biofilm. Most of it is hiding where you cannot see it.
The good news is that cleaning bath toys is easy once you know the routine. You do not need special equipment, and you do not need to spend an entire afternoon on it. What you need is the right method for each material, a few household staples, and a plan for getting every toy bone dry afterward. This guide walks through the whole process in seven clear steps, each with its own illustration, then covers cleaning solutions, schedules, mold warning signs, and the habits that keep the problem from coming back.
If you clean other playthings too, our guide on how to clean plastic toys safely is a great companion read for the rest of the toy box.
Why Bath Toys Get So Dirty (And Why It Matters)
A bathtub is a strange environment for a toy. It is warm, it is wet, and it is full of the things microbes love: skin cells, soap film, shampoo residue, and the occasional bit of lotion or sunscreen rinsing off small bodies. Toss a toy into that water every night, then leave it sitting in a damp corner, and you have created a small ecosystem.
The main culprit is trapped water. Squeeze toys, rubber ducks, and squirters are hollow. Every time a child squeezes one under water, it inhales a little bath water through the hole, and that water stays inside long after the tub drains. Because the inside cannot dry, mold and bacteria settle in and multiply. Researchers who cut open used bath toys have found dense microbial growth on the inner walls, often in toys that looked perfectly clean from the outside.
What is actually growing in there?
Most of what you find falls into three groups. Biofilm is a slippery layer of bacteria that sticks to surfaces and protects itself with a slimy coating; it is the reason a toy can feel greasy even after a quick rinse. Mold and mildew show up as black, gray, green, or pink specks, usually around seams and inside hollow toys. Soap scum and mineral deposits from hard water give bacteria something to cling to and make everything harder to rinse away.
Why kids are more affected than adults
Babies and toddlers put everything in their mouths, and bath toys are no exception. They also squeeze toys near their faces, splash the water into their eyes, and sometimes drink it. Skin that is scratched, has a rash, or is affected by eczema may react more strongly to contaminated water. Pediatric guidance generally treats dirty bath toys as a low-drama but real hygiene issue: not something to panic about, but definitely something to manage.
Good to know: A toy that looks clean is not necessarily clean. If a squeezable toy has a hole, assume the inside needs attention on a regular schedule.
Understanding the problem makes the solution feel much more logical. Everything in the steps that follow is aimed at one of three goals: remove what is already there, kill what remains, and make sure moisture does not stay behind to start the cycle over again.
Start with a fresh set of tub toys
Toys with no holes are the easiest to keep clean.
Know Your Toy Materials Before You Clean
Not every bath toy tolerates the same treatment. Hot water that is fine for hard plastic can warp soft vinyl, and a bleach soak that sanitizes a plastic boat can ruin the colors on a printed foam letter. Spend thirty seconds identifying what each toy is made of, and the rest of the process goes smoothly.
| Toy type | Common materials | Safe to soak? | Watch out for |
|---|---|---|---|
| Rubber ducks and squeeze toys | Vinyl, soft rubber, natural rubber | Yes, vinegar or diluted bleach | Trapped water inside the hole |
| Hard plastic boats, cups, and stackers | ABS, polypropylene | Yes, most solutions | Grime in seams and handles |
| Foam letters and shapes | EVA foam | Brief soak only | Absorbs water, can crumble, fades with bleach |
| Wind-up and battery toys | Plastic housing with mechanisms | No, wipe only | Rust and battery corrosion |
| Silicone toys | Food-grade silicone | Yes, very durable | Can hold onto soap film |
| Fabric bath books and mitts | Cloth or waterproof-coated fabric | Machine wash if labeled | Slow drying and musty smells |
| Wooden toys | Painted or sealed wood | No, wipe only | Swelling, cracking, peeling paint |
Sealed toys and toys with holes
Sealed toys, meaning those with no openings, are the easiest to maintain. There is nowhere for water to hide, so a soak and a wipe does the job. Toys with holes need the extra flushing step later in this guide. If you are not sure whether a toy is sealed, squeeze it under water. A stream of bubbles means there is an opening.
Wooden and electronic toys
Wood absorbs water and can swell or grow mold from the inside, so it rarely belongs in the tub at all. If you love natural materials, keep them for dry play; our list of the best wooden toys covers options that are better suited to the playroom. Anything with a motor, speaker, or batteries should only be wiped with a damp cloth, unless the packaging clearly says it is waterproof.
When in doubt, check the label or the manufacturer’s website. Many bath toy makers publish care instructions, and following them is the safest way to avoid accidentally damaging a favorite toy.
Silicone and sealed toys clean up fast
Durable materials that can handle regular soaking.
Supplies You Will Need
The full kit costs very little, and you probably own most of it already. Set everything out on the counter before you begin so you are not hunting for a brush with a sink full of soaking toys.
- A clean basin, bucket, or the kitchen sink. Big enough to fully submerge the toys with room to move them around.
- White distilled vinegar. Gentle, inexpensive, and effective against mineral buildup and many molds.
- Dish soap. A grease-cutting formula breaks up the slimy biofilm layer.
- Household bleach, unscented. Optional, for a deeper sanitizing pass. Never combine it with vinegar or any other cleaner.
- A soft brush and an old toothbrush. The larger brush handles surfaces; the toothbrush reaches seams, tight crevices, and around holes.
- A bottle brush or small pipe cleaner. For toys with narrow openings.
- A small funnel or squeeze bottle. Helpful for flushing the inside of squeeze toys.
- Clean microfiber towels. For drying the outside quickly.
- A drying rack, colander, or mesh bag. Air flow is the real secret to drying, not towel time.
- Rubber gloves and good ventilation. Especially when handling bleach.
Safety first: Never mix bleach with vinegar, ammonia, or any other cleaner. The combination can release harmful gases. Use one solution at a time and rinse thoroughly between them.
A quick word on natural cleaners
Many parents prefer to avoid harsh chemicals around babies, and vinegar is a solid first choice. It is not a true disinfectant in the regulated sense, but for routine cleaning it removes scum, deodorizes, and helps discourage mold. Save bleach for toys that already show mold or have been in contact with illness. We compare each option side by side later on, so you can decide what fits your household.
Stock your bath toy cleaning kit
Bottle brushes and detail brushes reach where fingers cannot.
Sort and Inspect Every Toy
Before any water touches a toy, take everything out of the tub, the bin, and the bag and lay it on a towel. This is your triage moment. Pick up each toy, look at it in good light, and sort it into three piles: toys that are fine, toys that need a deep clean, and toys that need to go.
What to look for
- Black, gray, green, or pink specks on the surface or visible through the hole. A little on the outside can be scrubbed away; a lot inside is a sign of heavy growth.
- Cracks, splits, and torn seams. Damaged toys collect water and are almost impossible to sanitize properly. They can also leave sharp edges.
- Sticky, chalky, or slippery feel. Usually biofilm or mineral scale, and both respond well to soaking.
- Musty smell. Squeeze the toy near your nose. A sour or swampy odor means the interior needs flushing.
- Faded paint or peeling decals. Peeling bits can end up in mouths, so remove those toys from the rotation.
Be willing to throw some away
This is the part most people resist. If a squeeze toy is heavily moldy inside, cleaning may not fully solve it, especially when the interior is dark and cannot be scrubbed. Bath toys are cheap. A child’s comfort and health are not. When you cannot see inside and the smell is strong, replacing the toy is a perfectly reasonable choice.
While you are sorting, this is also a good chance to thin the collection. Fewer toys in the tub means less to clean each cycle. Our guide on how often to rotate kids’ toys explains how keeping a smaller active set can make everything, from cleaning to cleanup time, easier to manage.
Replace the ones that did not make it
Look for sealed designs so there is nothing to trap water.
Rinse and Drain Away Loose Debris
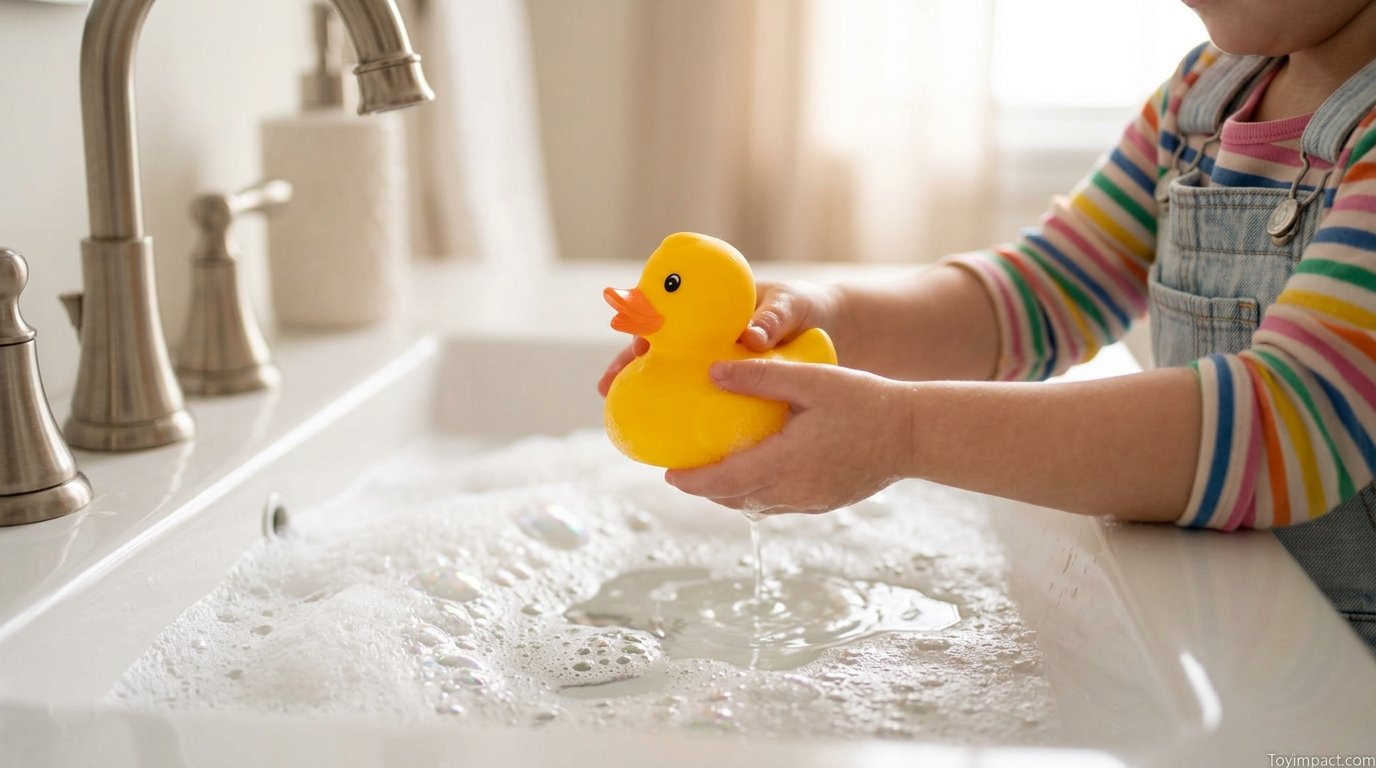
A first rinse sounds trivial, but it does a lot of work. Warm running water washes away soap scum, hair, and surface dirt so your cleaning solution can focus on the stubborn stuff instead of being used up on easy debris. It also gives you a chance to empty the water hiding inside hollow toys.
How to do it
- Run warm, not scalding, water. Very hot water can warp soft vinyl and rubber.
- Hold each toy under the stream and rotate it so every side gets rinsed.
- For squeeze toys, submerge, squeeze to fill, and then squeeze again to push the water out. Repeat until the water coming out looks clear.
- Watch what comes out. Cloudy, gray, or flecked water is a sign of buildup that will need the flushing step later on.
- Pour the used rinse water down the drain, not into a container you plan to reuse for soaking.
If you have a lot of toys, run them through a colander or mesh bag so you can rinse them all at once. Hard plastic toys with no holes can also be wiped down quickly with a soapy cloth at this stage, since there is nothing hidden to worry about.
Tip: If a squeeze toy squirts out black bits, stop and set it aside. That is mold coming loose from the interior, and it needs the soak and flush steps rather than a simple rinse.
Rinsing is also the right moment to wash out the bin or bag the toys usually live in. A clean toy dropped back into a slimy container will not stay clean for long.
Handy tools for rinsing in bulk
Colanders and mesh strainers make big batches painless.
Soak in a Cleaning Solution
The soak is where most of the cleaning happens. Time and contact do the work that scrubbing alone cannot, especially for the inside of hollow toys and the tiny crevices around handles and seams.
Option one: the vinegar soak
Mix equal parts white distilled vinegar and warm water in a basin. Submerge the toys, and for hollow ones, squeeze them under the surface so the solution flows inside. Set a plate or a bowl on top to keep floating toys underwater, then leave everything for thirty to sixty minutes. Vinegar loosens mineral scale and soap film, deodorizes, and helps discourage mold. It is gentle enough for most plastics, vinyl, and silicone.
Option two: the dish soap wash
For toys that are simply grimy rather than moldy, warm water with a squirt of dish soap is enough. Soak for ten to fifteen minutes, then move on to scrubbing. This works well as a weekly refresh between deeper cleanings.
Option three: a diluted bleach soak
If a toy has visible mold, has been in contact with illness, or you want the strongest sanitizing option, use a diluted bleach solution. A common guideline for sanitizing children’s toys is about one tablespoon of unscented household bleach per gallon of water, with the toys submerged for roughly two minutes. Check your bleach label for its own toy-safe instructions, use gloves, keep the room ventilated, and rinse very well afterward. Do not use bleach on foam, wood, or anything with a printed design you want to keep.
Never mix them: Do not combine bleach and vinegar in the same container, even in tiny amounts. If you use both methods, do them at different times and rinse the toys and the basin thoroughly in between.
While the toys soak, wipe down the bathtub edge, the toy bin, and the shelf where toys are stored. The cleanest toys will only stay that way if their surroundings are clean too.
Large basins make soaking simple
Pick a tub wide enough for the whole collection.
Scrub the Surfaces, Seams, and Crevices
Once the solution has done its job, scrubbing lifts what has been loosened. Skipping this step is the most common mistake, because a soaked toy can look clean and still carry a thin film that will regrow quickly.
Working through each toy
Take one toy at a time out of the soak. Using a soft brush and a little dish soap, scrub the entire outside surface, paying extra attention to seams, ridges, handles, and any place where a mold speck was spotted. Use small circular motions rather than hard scrubbing, which can scratch soft plastic and give bacteria new hiding places.
Switch to an old toothbrush for tight detail work, such as eyes, textured feet, the base of a beak, and the area right around the squeeze hole. If a toy has a narrow opening, a bottle brush or a small pipe cleaner can go a little way in, but do not force anything that might tear the material.
Handling stubborn spots
A paste of baking soda and a little water makes a gentle scrub for stained or stubborn areas. Apply it, wait a few minutes, and brush again. For toys with light mold on the outside, a second pass with a vinegar-dampened brush usually finishes the job. If the discoloration is inside and does not come out, treat it as a sign to use the flushing step or to replace the toy.
- Use a dedicated brush for toys instead of the one you use on dishes or the toilet.
- Scrub toys away from the sink drain so bits of debris do not wash right back onto them.
- Rinse your brush between toys, and replace it if the bristles look worn or stained.
If your toys go out into the backyard as well, our roundup of the best water table toys for the backyard includes ideas that are easy to rinse and dry.
The right brush makes it quick
Soft bristles clean without scratching.
Flush the Inside of Squeeze Toys
This is the step that separates a properly cleaned bath toy from one that only looks clean. Hollow toys with holes need to be flushed from the inside, because that is where the worst of the growth lives. If a toy has no hole, skip ahead to drying.
The flushing method
- Fill a cup or small bowl with your chosen solution, either the vinegar and water mix or the diluted bleach solution.
- Submerge the toy and squeeze it repeatedly so it draws the solution inside. A small funnel or squeeze bottle can help with narrow holes.
- Fill the toy about halfway, hold your finger over the hole, and shake it vigorously for thirty seconds so the liquid scours the inner walls.
- Pour it out and check the color. If dark bits or cloudy liquid come out, repeat with fresh solution until the liquid runs clear.
- Rinse the inside several times with clean water to remove any solution residue, squeezing until nothing but clear water comes out.
What if the toy is very moldy inside?
For a toy with heavy interior mold, one extended soak with the hole facing up so the solution stays inside for a full hour can help. If it still releases dark specks after two full rounds, the mold has likely embedded itself in the material, and it is time to replace it. Do not keep flushing the same toy indefinitely.
Prevention idea: Many families seal the hole of a squeeze toy with a dab of waterproof, non-toxic sealant or hot glue after cleaning. That turns it into a sealed toy that cannot fill with water. The trade-off is that it will no longer squirt or squeak, which some children will notice immediately.
Since sensory play is often the main appeal of squeezy and squirting toys, a sealed version may not suit every child. Our overview of what sensory toys are explains why that squeeze-and-squirt feedback matters so much for some kids, and it is worth weighing before you seal anything shut.
Small funnels and squeeze bottles help
Precise flushing with less mess.
Dry Every Toy Completely
If there is one step that decides whether all your hard work lasts, this is it. Mold needs moisture, and a toy that goes back into a damp bin will be growing again within days. Drying properly matters more than any cleaning product you choose.
The best drying routine
- Squeeze out as much water as possible from every hollow toy, then shake them firmly, hole down.
- Pat the outsides with a clean microfiber towel.
- Arrange toys on a rack, colander, or mesh drying bag with the hole facing down or to the side so any remaining water can drain out.
- Leave them in a well-ventilated spot for at least twenty-four hours. A fan nearby speeds things up dramatically.
- Before putting a toy away, squeeze it one more time. If any water comes out, keep drying.
Ways to speed up drying
Direct sunlight through a window helps and has a mild deodorizing effect, but avoid hours of baking sun on soft plastic, which can fade and warp. A small fan, a spot near an open window, or a spare dish rack are all effective. Some parents give hollow toys a gentle spin in a salad spinner, which uses centrifugal force to push water out of the openings surprisingly well.
Whatever method you choose, the key point is airflow. A wet toy on a towel on a counter dries only on the top; a toy sitting on a rack dries on every side.
A drying rack that fits the counter
Slim racks keep small toys upright and airy.
Store Bath Toys the Smart Way
Where toys live between baths matters as much as how you clean them. A sealed bin in a damp bathroom is one of the most reliable ways to grow mold. The goal is simple: keep toys dry, airy, and off the floor of the tub.
Storage options that work
- Mesh bags or nets on suction hooks. These let water drip away and air circulate, and they keep toys off the tub floor.
- Open-weave baskets. Good on a shelf outside the splash zone, as long as toys are completely dry when they go in.
- A plastic caddy with drainage holes. Water escapes through the bottom, and you can lift the whole thing out to clean it.
- A small dry bin outside the bathroom. For toys that are spotless and totally dry, especially if humidity in your bathroom is high.
Avoid closed containers, decorative buckets without holes, and anything that traps water. If you are short on space, our guide on organizing toy storage in small spaces has clever ideas that work in tight bathrooms and apartments.
Weekly habit: After every bath, spend two minutes squeezing water out of hollow toys and hanging the bag up. That single habit prevents most bath toy mold on its own.
Mesh bags with suction hooks
The easiest way to keep toys dry between baths.
Cleaning Solutions Compared
You now know three main ways to clean bath toys, and there are a few other tools that sometimes come up. Here is how they compare, so you can pick what suits the toy and your comfort level.
| Method | Best for | Contact time | Main drawback |
|---|---|---|---|
| White vinegar and water (1:1) | Routine cleaning, odors, mineral buildup | 30 to 60 minutes | Not a hospital-grade disinfectant |
| Dish soap and warm water | Weekly refresh of lightly dirty toys | 10 to 15 minutes | Does not reach interior mold well |
| Diluted bleach (about 1 tbsp per gallon) | Visible mold, illness, deep sanitizing | About 2 minutes | Harsh; can fade colors and damage foam |
| 3% hydrogen peroxide | Sensitive households wanting a bleach alternative | 10 minutes | Less effective on heavy mold |
| Dishwasher (top rack) | Hard plastic toys labeled dishwasher safe | One full cycle | Can warp soft or hollow toys |
| Washing machine (mesh bag) | Fabric bath mitts and cloth books | One gentle cycle | Not for anything hard or hollow |
Vinegar: pros
- Inexpensive and easy to find
- No harsh fumes
- Removes mineral scale
- Safe for most materials
Vinegar: cons
- Smell lingers until rinsed well
- Not a registered disinfectant
- Slower on heavy growth
Bleach: pros
- Strongest sanitizing power
- Works quickly
- Great for confirmed mold
Bleach: cons
- Needs gloves and ventilation
- Must be rinsed thoroughly
- Never mix with other cleaners
What about the dishwasher?
Hard, solid plastic toys that are marked dishwasher safe can go on the top rack, away from the heating element. Hollow squeeze toys are riskier: hot water can push into the toy, warp the shape, and leave water trapped inside where it cannot drain. If you use the dishwasher for those, pair it with the flushing step and long drying time afterward. For anything soft, foam, wood, or electronic, stick with the hand methods above.
Our full guide on cleaning plastic toys safely goes deeper on dishwasher and machine-wash rules for other toys around the house.
Stock up on cleaning basics
Distilled vinegar and mild dish soap cover most needs.
How Often to Clean, Warning Signs, and Prevention
Knowing the steps is one thing; building a rhythm you can actually keep is another. A simple schedule prevents big cleaning jobs and keeps the toys safe without becoming a chore.
A realistic cleaning schedule
| How often | What to do |
|---|---|
| After every bath | Squeeze out water, shake toys, and hang them to dry |
| Weekly | Quick dish soap wash for toys used in most baths |
| Every two to four weeks | Full vinegar soak and interior flush for toys with holes |
| After illness | Sanitize all toys used by the sick child with a diluted bleach soak |
| Every few months | Inspect for cracks and replace worn or moldy toys |
Warning signs to replace a toy
- Black or dark specks keep appearing inside after two full cleanings.
- The toy has a persistent sour or musty smell.
- Cracks, tears, or peeling paint are visible.
- The toy stays slimy even after scrubbing and soaking.
- A child has an unexplained skin or eye reaction after bath time, and the toy is a suspect.
If your child has ongoing rashes, ear infections, or eye irritation, talk to your pediatrician, and mention the toys if it seems relevant.
Special situations worth planning for
Hard water. If your tap water leaves white crust on faucets, it will also leave it on toys. That chalky film gives bacteria a rough surface to grip. A vinegar soak dissolves it nicely, and a quick vinegar rinse after each bath keeps it from building up.
Pool, beach, and travel toys. Toys that spend time in chlorinated pools, lakes, or the ocean need a fresh-water rinse and a full dry before they go into a bag or bin. Salt, sand, and pond water leave residue that soap alone may not remove, so treat them to the same soak and scrub routine every few uses.
Shared toys and multiple children. If siblings or visiting cousins share the tub, clean more often, especially when anyone has been sick. Sanitizing toys after an illness helps stop germs from passing around the household. Bath time is a natural moment for siblings to play side by side, and our list of the best toys for siblings to play together has ideas that hold up to sharing.
Toys that have been forgotten. Everyone has found a lost boat behind the toilet or under the bath mat. Treat a rediscovered toy as if it needs a full deep clean, with a soak, a scrub, and, if it is hollow, a flush. Never assume something that has been sitting damp for weeks is safe to hand back.
Getting children involved
Older toddlers and preschoolers often enjoy helping with toy cleanup. Let them squeeze water out of the ducks, drop toys into the mesh bag, or count how many toys go on the drying rack. It turns a chore into a little routine, teaches them about hygiene, and gets them used to the idea that toys need care. Keep them away from bleach and undiluted vinegar, and supervise any scrubbing with a brush.
Habits that prevent mold in the first place
Choose toys without holes when you can. Rinse toys with clean water at the end of each bath to remove shampoo and soap. Never leave toys sitting in standing water in the tub. Keep the bathroom ventilated with a fan or open window after showers. And be careful about adding new toys all at once: a smaller collection is easier to keep clean, and rotating sets keeps play fresh. If your child seems bored with the tub, our piece on why kids get bored of toys so fast explains why swapping a few items in and out works better than piling on more.
Younger children especially love simple, open-ended tub play. Stackable cups are a classic, and our explainer on what stacking toys are shows why they are so useful, and because they have no closed interior, they are among the easiest bath toys to keep clean.
Easy-clean bath toys for every age
Stackers, cups, and boats with open designs.
Frequently Asked Questions About Cleaning Bath Toys
How often should I clean bath toys?
Squeeze out and dry them after every bath, wash them weekly with soap and water, and do a full vinegar soak with an interior flush every two to four weeks. Toys with holes need the most attention, since they trap water inside.
What is the best way to clean the inside of a rubber duck?
Fill it with a half-and-half mix of white vinegar and warm water, shake it well, and drain it. Repeat until the liquid runs clear, then rinse with plain water several times. Let the duck dry with its hole facing down for at least a full day.
Is vinegar or bleach better for bath toys?
Vinegar is better for routine cleaning because it is gentle and easy to rinse. Diluted bleach is better for visible mold or after illness. Pick one method per session, and never combine them.
Can I put bath toys in the dishwasher?
Solid hard plastic toys labeled dishwasher safe can go on the top rack. Hollow, soft, or squeezy toys can warp or hold water, so hand cleaning is usually safer for those.
How do I get mold out of bath toys?
Scrub the outside with a soft brush and soapy water, then soak in vinegar or a diluted bleach solution and flush the inside repeatedly. If dark specks keep coming out after two rounds, replace the toy.
Is it safe for my baby to play with a toy that had mold?
It is best not to let a baby chew on or squeeze a toy with visible interior mold. Clean it thoroughly and only keep it if the inside runs completely clear; otherwise, replace it. Contact your pediatrician with any health concerns.
How do I stop water from getting trapped in bath toys?
Choose sealed toys with no holes, or seal the hole with a waterproof, non-toxic sealant. Always squeeze out water after bath time and dry toys with the hole facing down.
Can I use hydrogen peroxide instead of bleach?
Yes, three percent hydrogen peroxide is a common alternative for households that prefer to avoid bleach. It works well for light cleaning, though it may be less effective on heavy interior mold.
What is the black stuff that comes out when I squeeze a bath toy?
It is usually mold, mildew, and biofilm growing on the inner walls. It develops because bath water is trapped inside and never fully dries. Clean and flush the toy, or replace it if the growth returns.
How long do bath toys take to dry?
Most need about twenty-four hours in a well-ventilated area. Hollow toys may need longer. Squeeze them before storing; if any water comes out, keep drying.
Should bath toys be stored in the bathroom?
Yes, if they are stored in a mesh bag or open basket that allows airflow. Avoid closed bins or buckets that hold water. If your bathroom stays very humid, store fully dry toys elsewhere.
Can I wash foam or fabric bath toys?
Foam letters can be rinsed briefly and squeezed dry, but avoid long soaks and bleach. Fabric bath mitts and books that are labeled machine washable can go in a mesh bag on a gentle cycle, then be air dried completely.
Everything for cleaner bath time
Organizers, brushes, and easy-clean toys in one search.
Conclusion: Small Habits, Cleaner Bath Time
Cleaning bath toys is not complicated, but it does need to be consistent. Inspect and sort the collection, rinse away loose grime, soak in vinegar or a diluted bleach solution depending on how dirty things are, scrub the seams, flush the inside of squeeze toys, dry everything thoroughly, and store toys where air can move around them. Follow that routine every few weeks, add the two-minute squeeze-and-hang habit after each bath, and you will almost never see black flecks again.
Just as important, know when to let go. A moldy squeeze toy that keeps coming back is not worth the worry. Replace it with a sealed design, and bath time will be simpler for everyone. If you would like more ideas for what to put in the tub and beyond, browse the full range of picks at Toy Impact, or start with our roundup of the best toys.
Ready for a fresh, clean bath time?
Sealed, easy-dry toys keep the mold away.
You May Also Like
Keep exploring with more guides from Toy Impact.