How to Clean Battery Corrosion in Toys (Safely, Step by Step)
That crusty white or blue-green powder inside a favorite toy isn’t the end of the road. Here’s how to clean it properly, bring the toy back to life, and stop it from happening again.
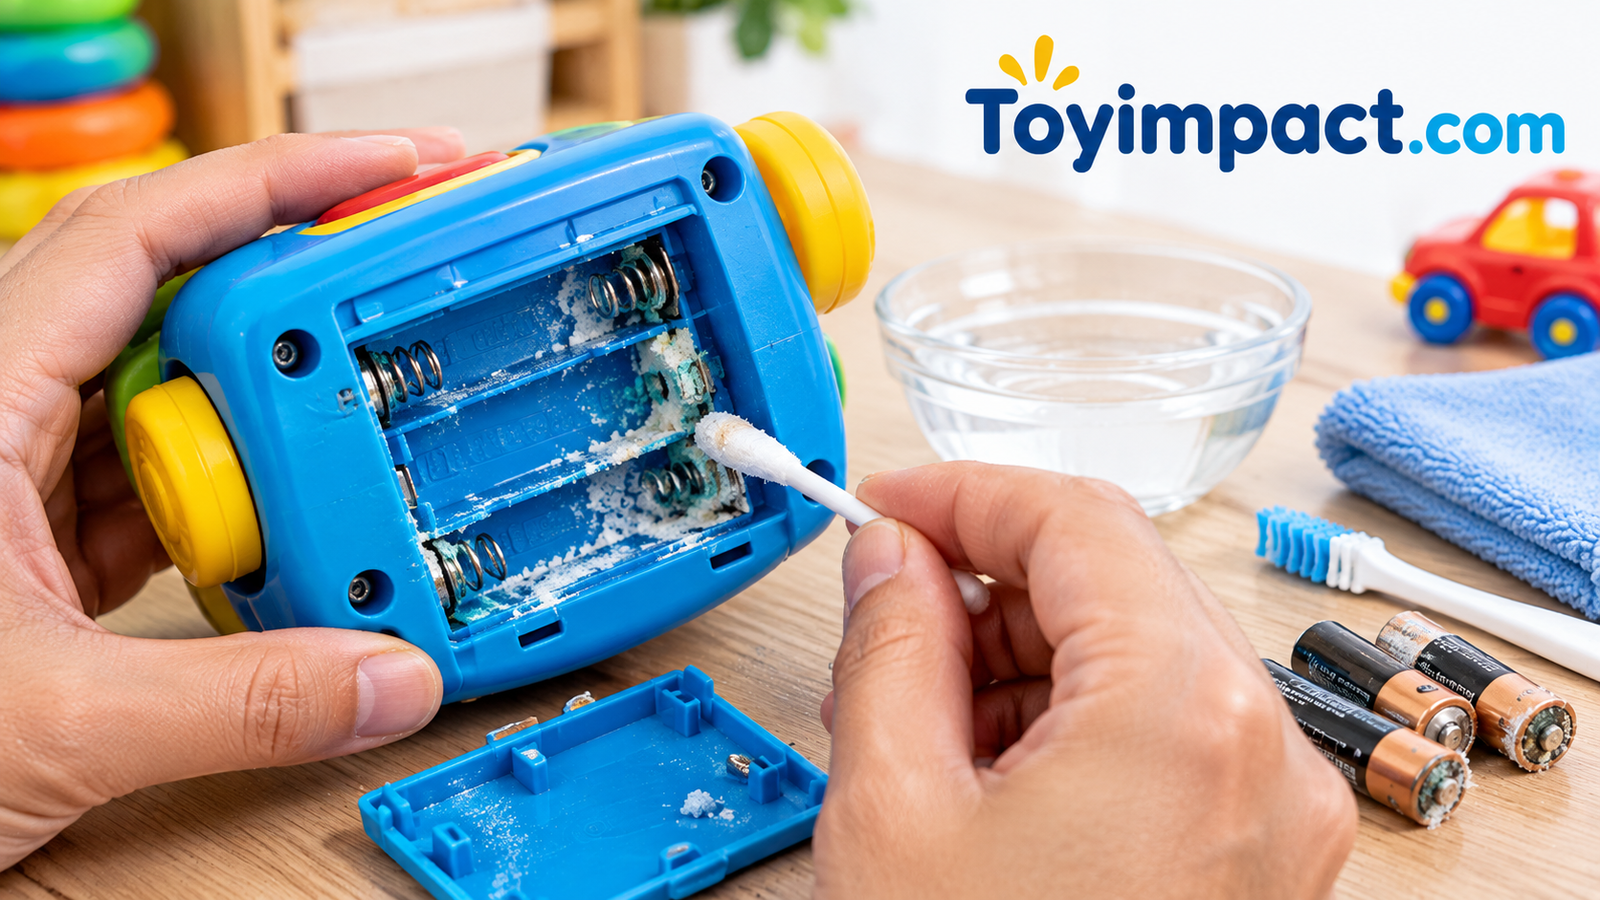
You pull a toy out of the closet, slide open the battery door, and there it is: a white, crumbly crust wrapped around the springs, or a greenish-blue fuzz creeping across the metal contacts. The toy won’t light up, won’t make noise, and looks a little bit like a science experiment gone wrong. Before you toss it, take a breath. In most cases, battery corrosion in toys is very fixable with household supplies and about twenty minutes of patient work.
This guide walks you through the whole process: what the crust actually is, how to protect your skin and eyes, the exact tools you need, seven clear steps (each with a diagram), what to do when the damage is serious, and how to keep it from coming back. If you’re also refreshing the rest of the toy box, our guide on how to clean plastic toys safely pairs nicely with what you’ll learn here.
1. What Battery Corrosion Actually Is
Battery corrosion is the residue left behind when the chemicals inside a battery escape the casing and react with air, moisture, and the metal parts of your toy. It usually shows up as a dry, powdery, white or off-white crust. Sometimes it looks blue or green, which typically means the leaked material has reacted with copper or brass contacts. Occasionally it appears as a sticky, wet film, especially in humid rooms.
The most common culprit in toys is the standard alkaline battery, the AA, AAA, C, and D cells that power everything from talking dolls to remote-control cars. Alkaline batteries get their name from the potassium hydroxide electrolyte inside. When that liquid leaks, it reacts with carbon dioxide in the air and forms potassium carbonate, the white crystals you see. Potassium hydroxide is caustic, which is why you want gloves on before touching any of it.
What corrosion looks like
- White, powdery crust: classic alkaline leakage, usually around the negative terminal.
- Blue or green fuzz: leaked electrolyte reacting with copper or brass contacts.
- Brown or rusty spots: moisture plus steel springs; the metal itself is oxidizing.
- Sticky or wet residue: a fresh leak that hasn’t dried out yet.
- A swollen or bulging battery: a warning sign that a leak is coming.
Corrosion doesn’t just look bad. That crust is a poor conductor, so it blocks electricity from moving between the battery and the toy’s circuit. That’s why a toy with a leaked battery can act totally dead even when the motor and speaker are fine.
Want a fresh, reliable set of batteries ready for after the cleanup?
Shop Batteries on Amazon2. Why Toy Batteries Leak in the First Place
Understanding the cause is the best way to avoid a repeat. Toys are unusually hard on batteries because of how they’re used, or more accurately, how they’re not used. A toy might get intense play for a week, then sit in a bin for six months with the batteries still inside.
The usual suspects
- Batteries left in stored toys. Even a switched-off toy can have a tiny standby draw, and over time a fully drained cell becomes more likely to leak.
- Old and new batteries mixed together. Weaker cells get pushed into deep discharge by stronger ones, which raises leak risk.
- Mixing brands or chemistries. Alkaline with rechargeable, or two different brands, drain at different rates.
- Heat and humidity. Garages, attics, hot cars, and steamy bathrooms speed up the chemical reactions.
- Age. Every battery has a shelf life, and expired cells are more prone to seepage.
- Reversed or damaged cells. Installing a battery backward or using a dented one can cause leaks.
- Cheap or off-brand cells. Some have thinner seals that fail sooner.
The good news is that almost all of these are habits you can change. We’ll cover them in detail in the prevention section. For rotating toys in and out of storage without forgetting about batteries, see our tips on how often you should rotate kids’ toys.
Rechargeable cells can be a smart swap for high-use toys.
Browse Rechargeable Batteries3. Safety Before You Touch Anything
Toys go to kids, and kids put things in their mouths, so safety matters twice here. Leaked alkaline electrolyte can irritate or burn skin and can seriously hurt eyes. Take these precautions every single time.
- Wear disposable gloves. Nitrile gloves are ideal. Bare hands and corrosion don’t mix.
- Wear eye protection. Safety glasses or goggles keep flecks of crust out of your eyes when you scrape and scrub.
- Work in a ventilated area. Open a window or work near one, and avoid breathing in the dust.
- Keep children and pets away. Do this at a table they can’t reach, and never leave the work unattended.
- Protect your work surface. Lay down newspaper, a paper towel layer, or an old towel.
- Never mix cleaning chemicals. Vinegar or lemon juice is all you need. Skip bleach and ammonia entirely.
Also keep in mind that coin-shaped button cells are a different and more urgent hazard for small children if swallowed. If your toy uses one, read our explainer on which toys have button batteries and make sure every compartment is screwed shut.
Protective gear is inexpensive and worth having in the junk drawer.
Find Gloves & Safety Glasses4. Supplies You’ll Need
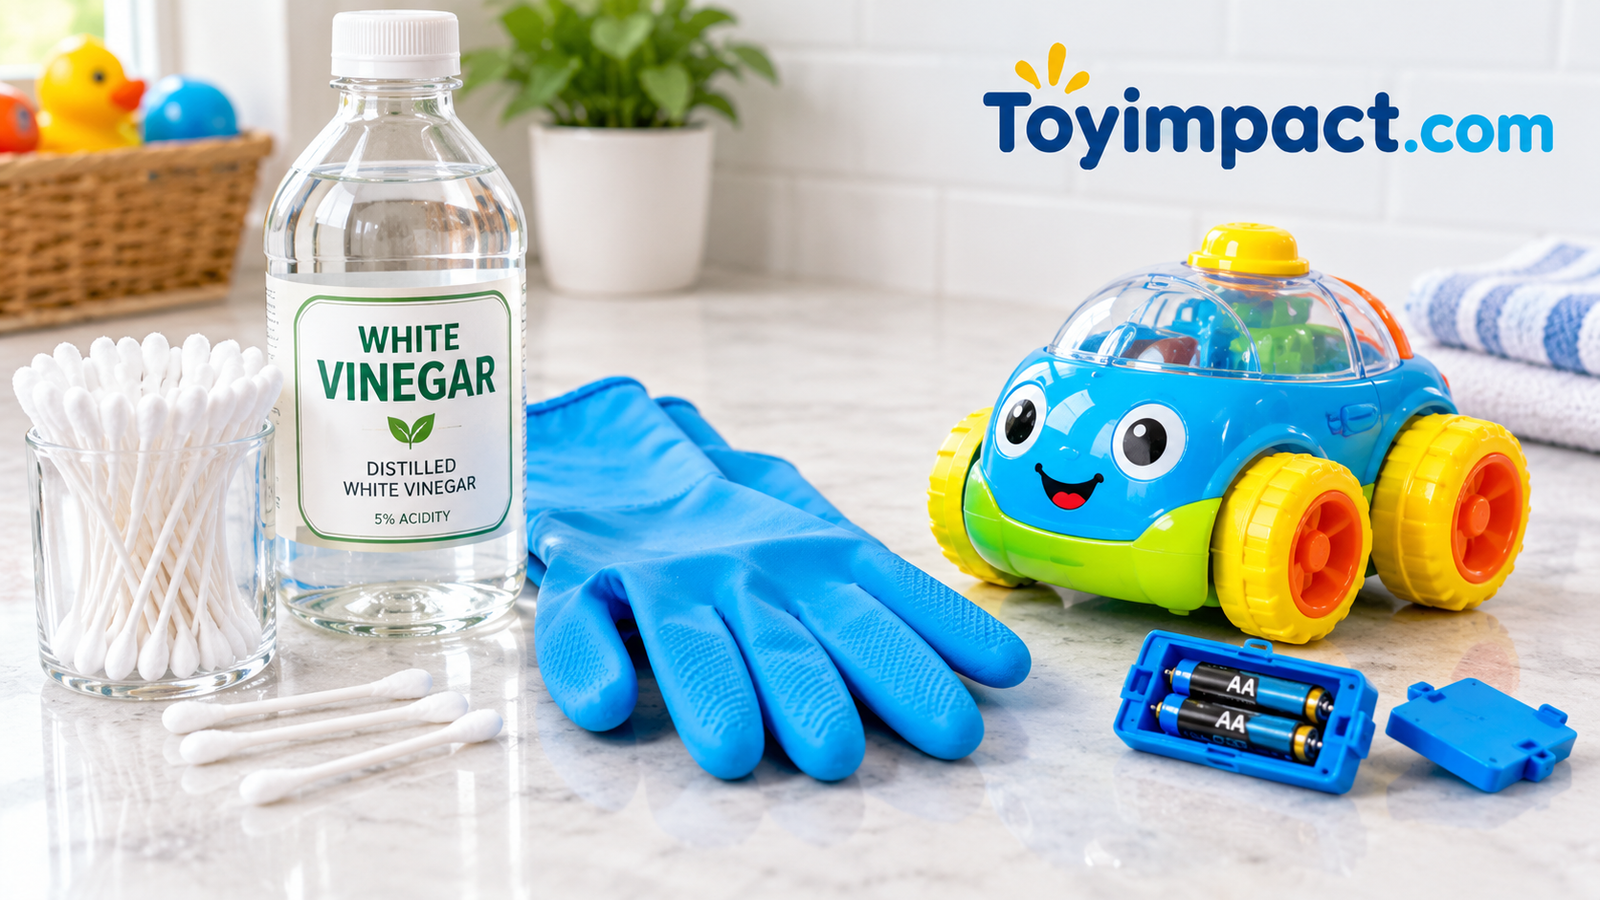
You likely own most of this already. Nothing here is fancy, and the whole kit costs very little.
| Item | What it does | Substitute |
|---|---|---|
| Nitrile gloves | Protects skin from caustic residue | Any disposable gloves |
| Safety glasses | Shields eyes from flakes | Sunglasses in a pinch |
| White vinegar or lemon juice | Mild acid that neutralizes alkaline crust | Either works equally well |
| Cotton swabs | Applies liquid precisely and lifts residue | Small paintbrush |
| Old toothbrush | Scrubs corners and springs | Stiff small brush |
| Paper towels or lint-free cloth | Wipes and dries | Microfiber cloth |
| Small screwdriver set | Opens screwed battery doors | Precision kit |
| Isopropyl alcohol or contact cleaner | Removes moisture and film, evaporates fast | Extra dry wipe |
| Fine sandpaper or pencil eraser | Polishes stubborn contact spots | Emery board |
| Fresh batteries | Final test | Rechargeables |
Why vinegar or lemon works
- Cheap and already in your kitchen
- Gentle on most plastics
- Neutralizes alkaline crust on contact
Watch out for
- Don’t soak the toy or circuit board
- Use only a small amount at a time
- Dry thoroughly before new batteries
A small precision screwdriver set makes battery doors a breeze.
Shop Screwdriver Sets5. Steps 1–2: Prepare and Assess the Damage
Good cleaning starts with good prep. These first two steps take five minutes and prevent most accidents and mistakes.
Step 1Remove the batteries and set up safely
Switch the toy off, put on your gloves and glasses, and lay out your work surface. Open the battery compartment, using a screwdriver if it’s held shut. Remove every battery, even the ones that look fine. Grip each one by its sides and lift it out. If a battery is stuck to the contacts by dried crust, work a plastic spoon handle or a wooden toothpick gently underneath to free it. Don’t pry with metal, and never force it.
Set the old batteries aside on a paper towel. Leaked cells should not go back into the toy, and we’ll cover disposal later.
Step 2Assess how bad the corrosion is
Look closely at the contacts, springs, and compartment walls, using a flashlight if you need it. Sort the damage into one of three levels:
- Light: a dusting of white powder on one or two contacts. Very easy.
- Moderate: crusty buildup across springs and terminals, possibly some color change on the metal.
- Severe: corrosion that has crept along wires, eaten into springs, or seeped onto the circuit board.
Light and moderate cases respond well to the steps below. Severe cases may need extra work, covered in the “stubborn cases” section. Snap a quick phone photo before you start so you can compare after.
A small flashlight and magnifier help you spot hidden corrosion.
See Inspection Tools6. Steps 3–5: Neutralize, Scrub, and Dry
This is the heart of the job. The idea is simple: neutralize the crust with a mild acid, lift it off, then dry everything completely.
Step 3Neutralize the crust with vinegar or lemon juice
Dip a cotton swab in white vinegar or lemon juice and squeeze out the excess until it’s damp, not dripping. Dab it onto the corrosion. You may see faint fizzing or the crust softening, which means the acid is reacting with the alkaline residue. Let it sit for one to two minutes.
Less is more. Liquid that pools can run into the toy’s electronics, which is the one thing you really want to avoid.
Step 4Scrub away the loosened residue
Switch to a dry cotton swab or an old, dry toothbrush and gently scrub the softened crust. Work from the outside of the buildup toward the middle so you don’t push residue into gaps. Use a wooden toothpick to reach into the tight corners of springs. Swap swabs often; once a swab is loaded with residue, it just moves it around.
Repeat steps 3 and 4 as needed. Stubborn crust often takes two or three rounds.
Step 5Wipe clean and let everything dry completely
Dampen a fresh cotton swab with isopropyl alcohol, or use electronics contact cleaner if you have it, and wipe over the cleaned metal. Alcohol evaporates quickly and pulls away leftover moisture and acidic film. Then dab with a dry paper towel and leave the compartment open for at least thirty minutes, ideally an hour, in a well-aired spot.
Cotton swabs and isopropyl alcohol are cleanup staples.
Shop Cleaning Supplies7. Steps 6–7: Restore the Contacts and Test the Toy
Once everything is dry, you can check whether the metal is truly clean and conductive again.
Step 6Polish stubborn spots on the contacts
If a dull film or discoloration remains on a flat contact plate, buff it lightly with a pencil eraser, a strip of fine sandpaper, or an emery board. The goal is bright, shiny metal, so use light pressure and only a few strokes. Wipe away the dust with a dry swab. Don’t sand hard, because thin metal plating can wear through and make things worse. Never sand the springs aggressively; use the toothpick and swab instead.
Step 7Install fresh batteries and test
Insert brand-new batteries of the same brand and type, matching the plus and minus marks in the compartment. Close the door, switch the toy on, and check that it works. If it lights, moves, or makes noise, you’re done. Screw the battery door shut, especially for toddler toys.
If the toy still doesn’t work, check the battery orientation, try another set of batteries, and look again for corrosion further down the wires. For toys used on the go, our picks in best remote control toys show which models use easy-access compartments.
Start the toy off right with a trusted pack of fresh cells.
Shop AA & AAA Batteries8. Severe Damage and Stubborn Cases
Sometimes a light wipe isn’t enough. Here’s how to handle the tougher situations without making things worse.
Corrosion on the springs
Springs are the trickiest part because the crust hides between the coils. Soak a cotton swab, apply vinegar to the coils, and let it sit a full two minutes before scrubbing with a toothpick or an old toothbrush. If a spring is rusted through, badly stretched, or broken, it’s better to replace it than to fight it. Many hobby and electronics shops sell small replacement springs.
Corrosion that has spread past the compartment
If residue has traveled along wires or onto the circuit board, stop using liquid vinegar near the board. Use a swab slightly dampened with isopropyl alcohol and a soft brush instead, working carefully with the toy fully unplugged and battery-free. If you’re not comfortable opening the toy, it may be safer to leave it.
Dried, stuck-on crust
Give it repeated short applications rather than one long soak. Apply, wait, scrape gently with a wooden toothpick, and repeat.
Worth repairing
- Toy has sentimental value
- Corrosion is limited to the compartment
- Springs and contacts are intact
Probably not worth it
- Corrosion is all over the circuit board
- Wires are eaten through
- The toy is inexpensive and easy to replace
Electronics contact cleaner can help with tough oxidation.
See Contact Cleaners9. Battery Types Compared: Not All Leaks Are the Same
The vinegar method above is for alkaline leaks. Other battery chemistries behave differently, and treating them the same way can backfire.
| Battery type | What leaks | How to clean | Notes |
|---|---|---|---|
| Alkaline (AA, AAA, C, D) | Potassium hydroxide, forms white crust | Mild acid: vinegar or lemon juice | The most common toy leak |
| Zinc-carbon | Acidic or salty electrolyte | Dry brush, then damp cloth with water or a little baking soda solution | Older, cheaper cells; leak often |
| NiMH / NiCd rechargeable | Alkaline electrolyte (rarely leaks) | Vinegar or lemon juice, same as alkaline | Follow manufacturer guidance for damaged cells |
| Lithium coin / button | Small amount of electrolyte | Dry wipe or a little isopropyl alcohol | Don’t use vinegar; keep away from children |
| Lithium-ion pack | Flammable electrolyte | Do not clean. Stop and dispose safely | Swollen or hot packs are a hazard |
When you can’t identify the battery type or the leaking looks unusual, treat it cautiously: wear gloves and glasses, wipe with a dry cloth, and check the toy’s manual or the battery maker’s site. Swollen lithium-ion packs, such as those in some rechargeable ride-ons and RC toys, should never be cleaned. Stop using them and take them to a proper battery drop-off point.
Not sure which cells your toy takes? Check the manual, then match the type.
Browse Coin Cell Batteries10. Special Toys and Sealed Compartments
Not every toy has a friendly battery door. A few types need extra care.
Plush toys and squishy toys with battery packs
Talking plush toys often hide a small battery box in a zippered or stitched pocket. Remove the pack before cleaning the plush, treat only the compartment, and never wet the electronics. If the toy is soft and squishy, our advice on how to clean squishy toys covers the outer material safely.
Bath toys
Bath toys that light up or spin are the most vulnerable to moisture, which speeds up corrosion. Dry the compartment fully after every bath, and consider our guide on how to clean bath toys for the exterior.
Musical and sensory toys
Toys that play songs or make sounds often have tiny speaker contacts near the battery bay. Be extra gentle there. Many of these fall into the categories described in what are musical toys and what are sensory toys, and are typically used every day, which means it’s worth doing the cleanup properly.
Toys with screwed-shut or sealed bays
A few toys have battery bays that are glued or ultrasonically welded. Trying to open those can damage the toy or create sharp edges. If the leak isn’t accessible, the toy is generally best retired.
Screwdriver bits for tiny toy screws come in handy for these jobs.
Shop Toy Repair Kits11. Preventing Corrosion for Good
A little routine goes a long way. These habits make leaks far less likely.
- Remove batteries from toys you won’t use for a few weeks. This is the single most effective habit.
- Replace all batteries at once. Never mix old and new, or different brands or chemistries.
- Use quality batteries. Reputable brands generally have better seals.
- Check dates. Use cells before they expire and don’t stockpile years of spares.
- Store at moderate temperatures. Keep toys and spare batteries away from heat, damp, and direct sun.
- Consider rechargeables for toys that get heavy use.
- Do a quick check every season. Open the bay and take a peek.
- Keep spare batteries in a case, not loose in a drawer where they can touch and short.
Storage habits matter as well. If you’re tidying a packed playroom, our guide to organizing toy storage in small spaces can help you set aside a “batteries out” bin for the toys in rotation.
A battery organizer keeps spares tidy and safe.
Shop Battery Organizers12. When to Replace the Toy and How to Dispose of Old Batteries
Sometimes the kindest decision is to let the toy go. If corrosion has destroyed the circuit board, the wiring is eaten through, or the repair would cost more than a replacement, it’s time. If your child is asking for a new favorite anyway, browse our roundup of the best toys for fresh ideas.
Disposing of leaked batteries safely
- Wear gloves and wrap leaking batteries in a paper towel or place them in a plastic bag.
- Don’t throw them in a fire or crush them.
- Take them to a battery recycling drop-off, a household hazardous waste site, or a retailer take-back bin. Local rules vary, so check your area’s guidance.
- Put tape over the terminals of lithium and rechargeable cells before dropping them off.
- Dispose of used swabs and paper towels in the trash after use.
Repair it if
- Only the compartment is affected
- The toy is well-loved or costly
- Springs are intact
Replace it if
- The circuit board is damaged
- The battery bay is sealed
- A lithium-ion pack has swollen
Ready for a fresh start? Explore new battery-free and battery-powered toys.
Browse Toys on AmazonFrequently Asked Questions
What is the white powder in my kid’s toy battery compartment?
It’s usually potassium carbonate, formed when leaked alkaline battery electrolyte reacts with carbon dioxide in the air. It’s caustic, so wear gloves and avoid touching it with bare skin.
Is battery corrosion dangerous to children?
It can irritate skin and eyes and shouldn’t be touched or swallowed. Keep leaked toys away from children until they’re cleaned, and rinse any contact with plenty of water and seek medical advice if needed.
Can I use vinegar or lemon juice to clean battery corrosion?
Yes, for alkaline battery leaks. Both are mild acids that neutralize the alkaline residue. Apply with a damp cotton swab, not a soaking wet one.
Should I use baking soda for corrosion in toys?
Baking soda is a base, so it’s suited to acidic leaks such as those from older zinc-carbon batteries. For common alkaline leaks, vinegar or lemon juice is the better choice.
Can I clean a toy without removing the batteries?
No. Always remove every battery first, both for safety and so you can reach the contacts properly.
Why does my toy still not work after cleaning?
Check that the contacts are fully dry and shiny, the batteries are inserted correctly, and the batteries are fresh. Hidden corrosion on wires or a damaged spring can also be the cause.
How long does it take to clean battery corrosion?
Light corrosion usually takes about ten to twenty minutes plus drying time. Moderate or stubborn cases can take longer because they need repeated applications.
Can I use rubbing alcohol on toy electronics?
Yes, isopropyl alcohol is commonly used for cleaning contacts because it evaporates quickly. Use it sparingly on a swab, keep it away from open flames, and let the area dry fully.
How do I stop toy batteries from leaking?
Remove batteries from toys that will be stored, replace all cells at the same time, avoid mixing brands or types, use quality batteries, and store toys somewhere cool and dry.
Are rechargeable batteries less likely to leak?
Rechargeable NiMH cells are generally less prone to leaking than cheap alkaline cells, but they aren’t leak-proof. Follow the charger and toy instructions and don’t mix them with other types.
How do I dispose of a leaking battery?
Wear gloves, wrap the battery in a paper towel or bag, and take it to a battery recycling or household hazardous waste drop-off. Don’t put it in with regular recycling.
Is it safe to keep using a toy after a battery has leaked?
It can be, if the corrosion was limited to the battery compartment and you’ve cleaned and dried it properly. If the circuit board or wiring is damaged, or the toy has a sealed bay, it’s better to replace it.
Conclusion
Battery corrosion in toys looks alarming, but it’s one of the most fixable problems in the toy box. Put on gloves and glasses, take the batteries out, neutralize the crust with vinegar or lemon juice, scrub gently, dry everything thoroughly, buff the contacts, and test with fresh batteries. Match the method to the battery type, know when to walk away, and build the simple habit of pulling batteries from toys before storing them.
Do that, and the next time you open a toy after a few months, the only surprise inside will be a working toy and a happy kid.
Stock up so the next battery swap goes smoothly.
Shop Toy Batteries on Amazon